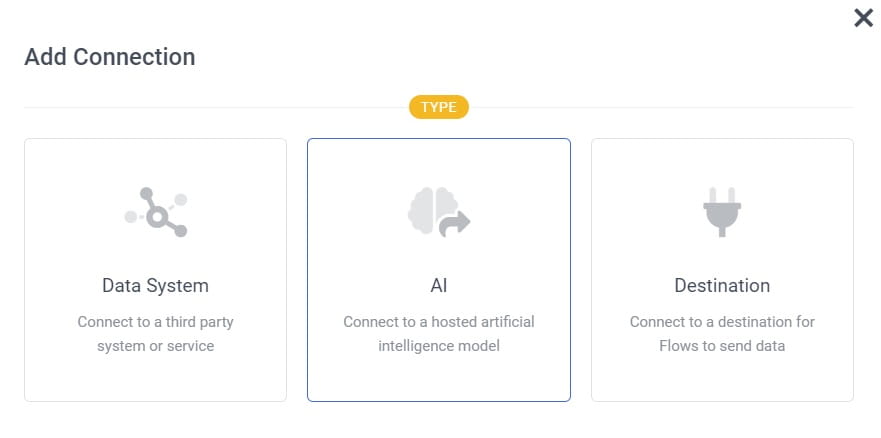
There are 3 types of connections in Sitecore CDP:
- Data System - can be used in Decision models as external source of data.
- AI - can be used in Decision models as a logic block that performs any calculations on external service side.
- Destination - can be used in Full stack experiences to send data to external services.
In this article I`ll show how to create AI connection to Azure Cognitive Face API service and use it decision modeling to provide personalized offers to customers.
For my demo I`ll use customer photo to predict his age and gender and provide personalized offer based on this information.
If you don`t have Azure account, scroll to the bottom of the article where I share links to my own Face API implementation that you can use instead of Azure Face API.
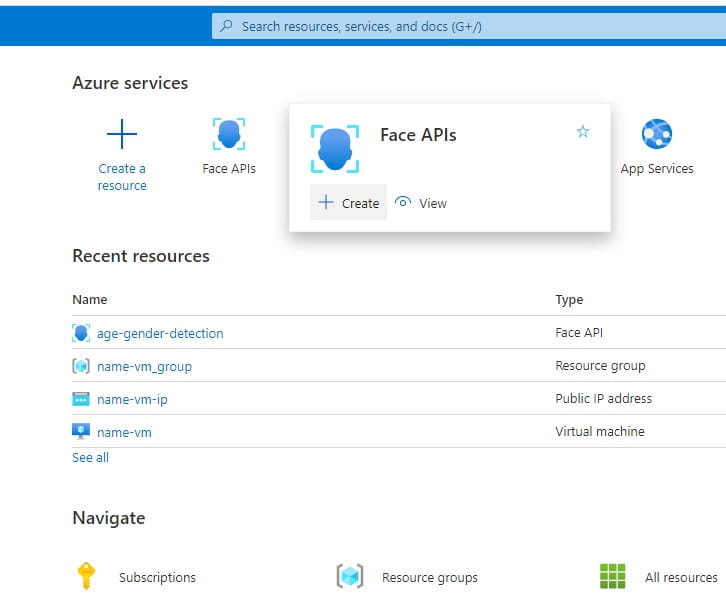
How to get access to Azure Face APIs?
You need to login to your Azure account, find Face APIs in Azure services and create new one:
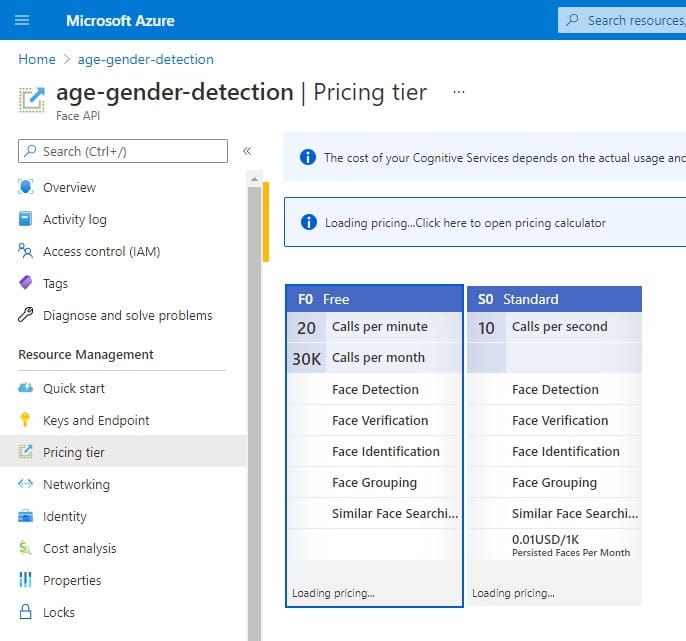
Free Face APIs service has some limitations like 20 requests per minute, so try to make requests in reasonable places (user uploads/changes photo):
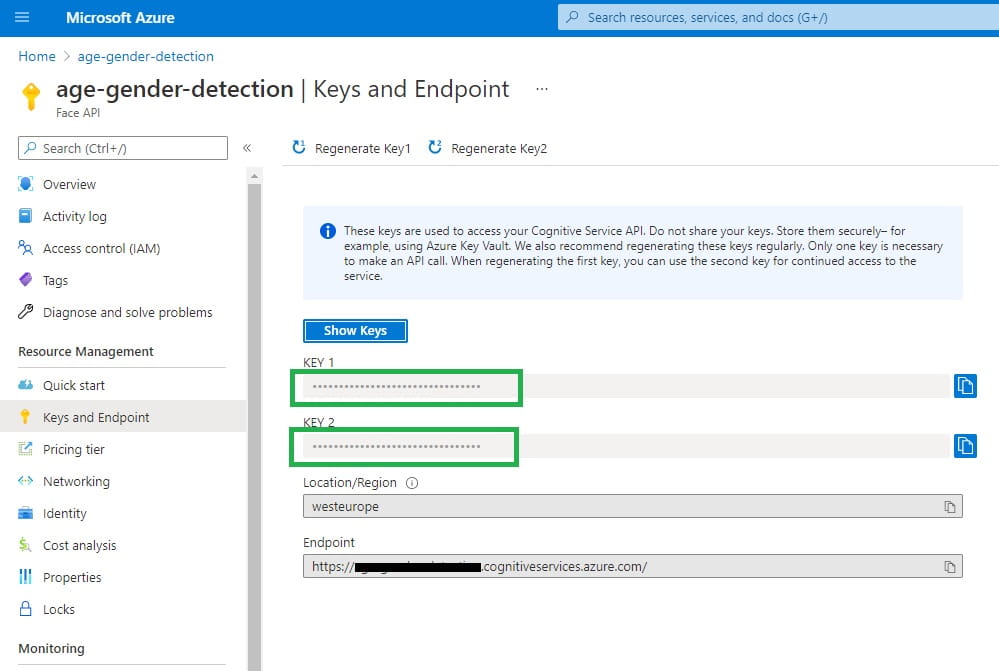
When Face APIs service is created, navigate to Keys and Endpoint settings and copy one of the keys:
How to setup AI connection in Sitecore CDP?
Login to your Sitecore CDP application account, Connections -> Add Connection-> AI. Enter Name and Description of your connection, choose None on Athentification tab and configure request parameters:
- Method: POST
- URI: copy url
- Add header: Ocp-Apim-Subscription-Key: your_Azure_KEY1_or_KEY2
- Request:
{
  "url": "${url}"
}
${url} variable will be subsctituted in Decision model with url of user photo. For URI endpoint chose closest one for your location from Face API documentation.
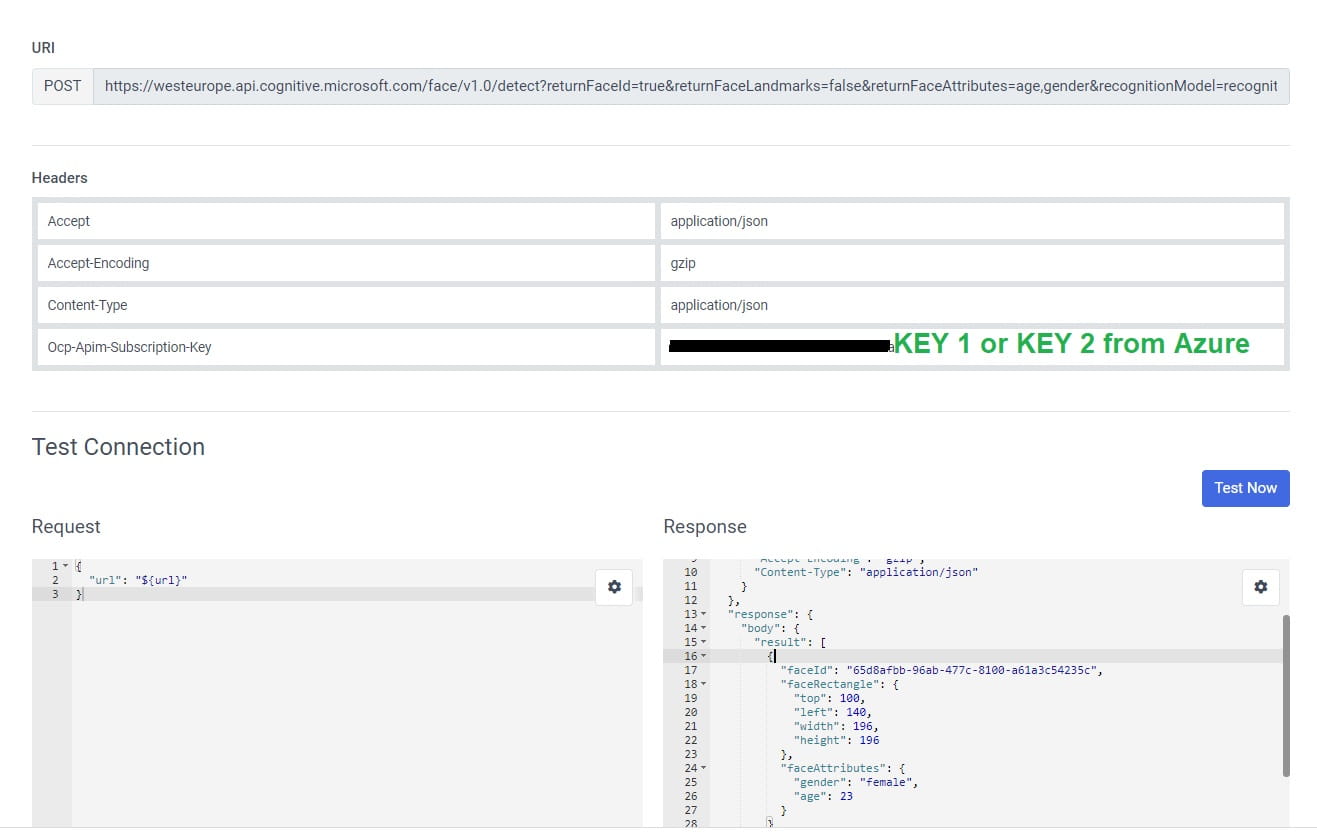
Click Test Now button, insert any url with person photo and click Run Test button. If connection is OK, you will see response from Azure:
  "response": {
    "body": {
      "result": [
        {
          "faceId": "65d8afbb-96ab-477c-8100-a61a3c54235c",
          "faceRectangle": {
            "top": 100,
            "left": 140,
            "width": 196,
            "height": 196
          },
          "faceAttributes": {
            "gender": "female",
            "age": 23
          }
        }
      ]
    }
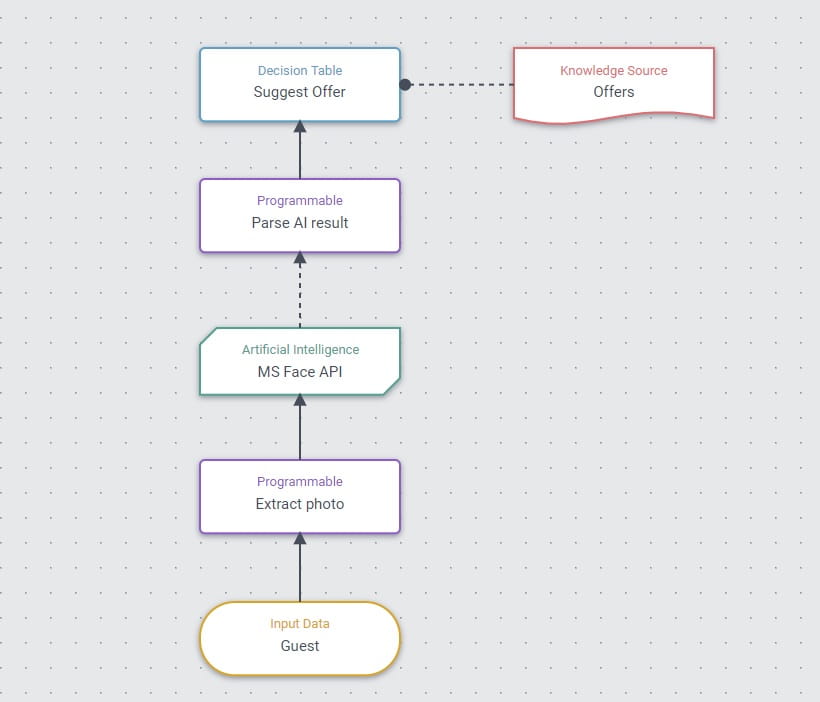
Once connection is ready, it is time to modeling. Create new Decision model and populate it with blocks like this (MS Face API block is our created AI connection):
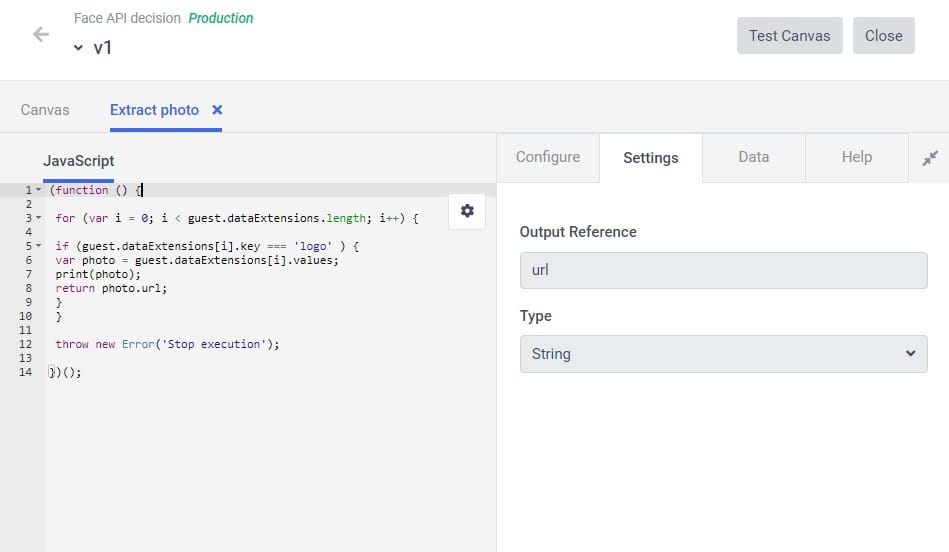
For my demo I store customer photo in profile extended properties (see this article if you don`t know how to do it).
In Extract photo block I extract user photo url from profile extented properties and pass it to recently created MS Face API connection:
(function () {

 for (var i = 0; i < guest.dataExtensions.length; i++) {
	 if (guest.dataExtensions[i].key === 'logo' ) {
		 var photo = guest.dataExtensions[i].values;
		 print(photo);
		 return photo.url;
	 }
 }

 throw new Error('Stop execution');

})();
Output for this block is: url - string.
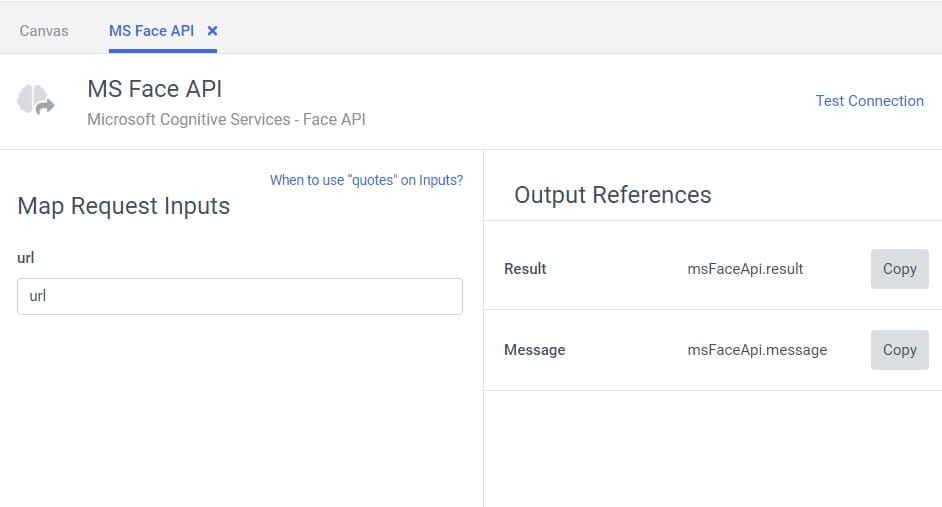
In Artificial Intelligence block I just set url parameter from previous block as an input:
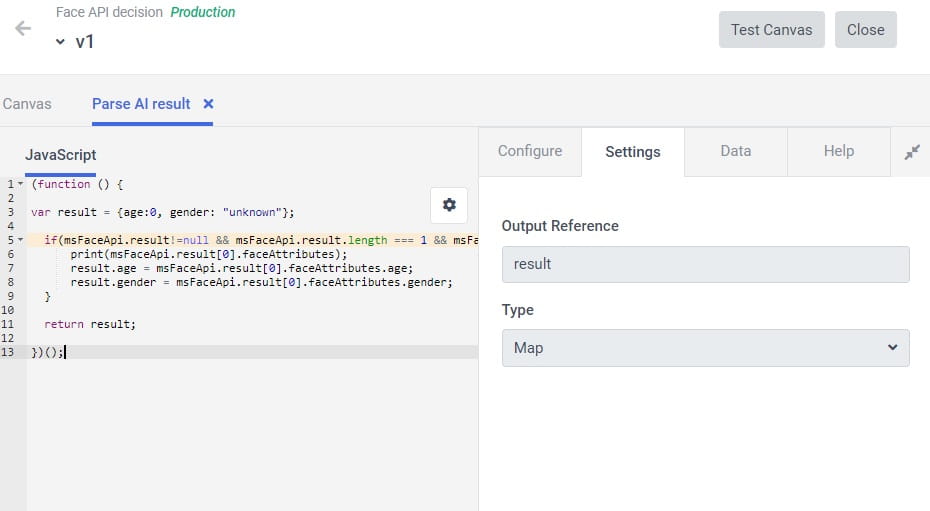
In Parse AI result block I parse AI response and provide output data in format {age: 0, gender: 'male'} to decision block:
Before continue with decision we need to create Offers for our future experience. Navigate to Library -> Offer Templates and create new one:
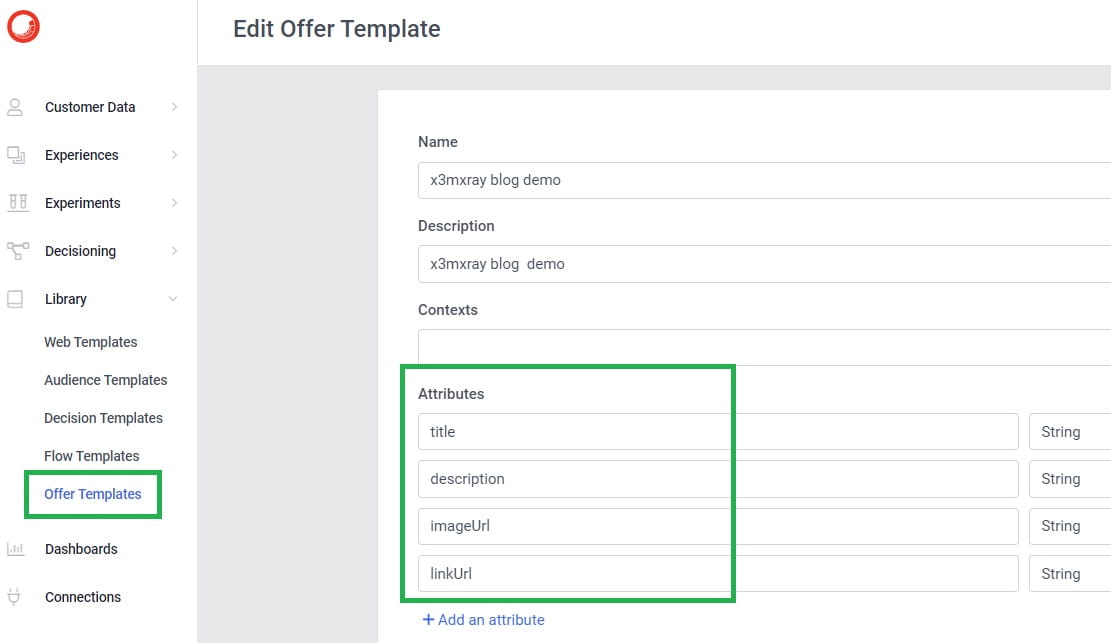
I will use this attributes to substitute offer values in my web experience (corner popup window).
Next, navigate to Decisioning -> Offers and create offers based on your offer template (as much as you need). In my example I create 2 offers: one for women with age in range 25-35, the second one for retiree customers. Example of offer:

When offers are ready it is time to come back to our decision model and configure last Suggest Offer block:
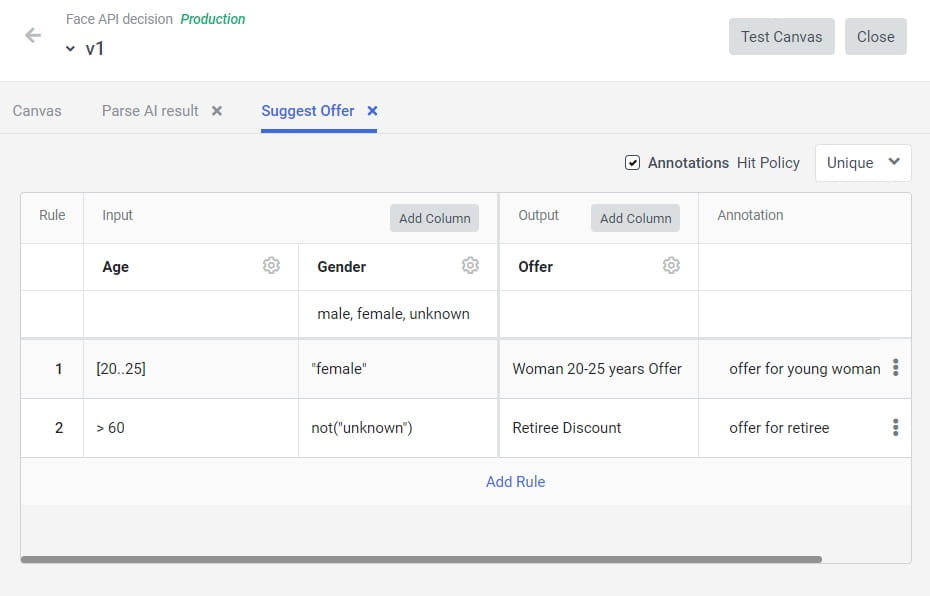
Column settings:
Age. Format: Expression, Column Input: result.age, Type: integer.
Gender. Format: Expression, Column Input: result.gender, Type: string.
Offer. Format: Offer, Choose Offer Template: your recently created offer template.
Configure rules logic that your need for your offers.
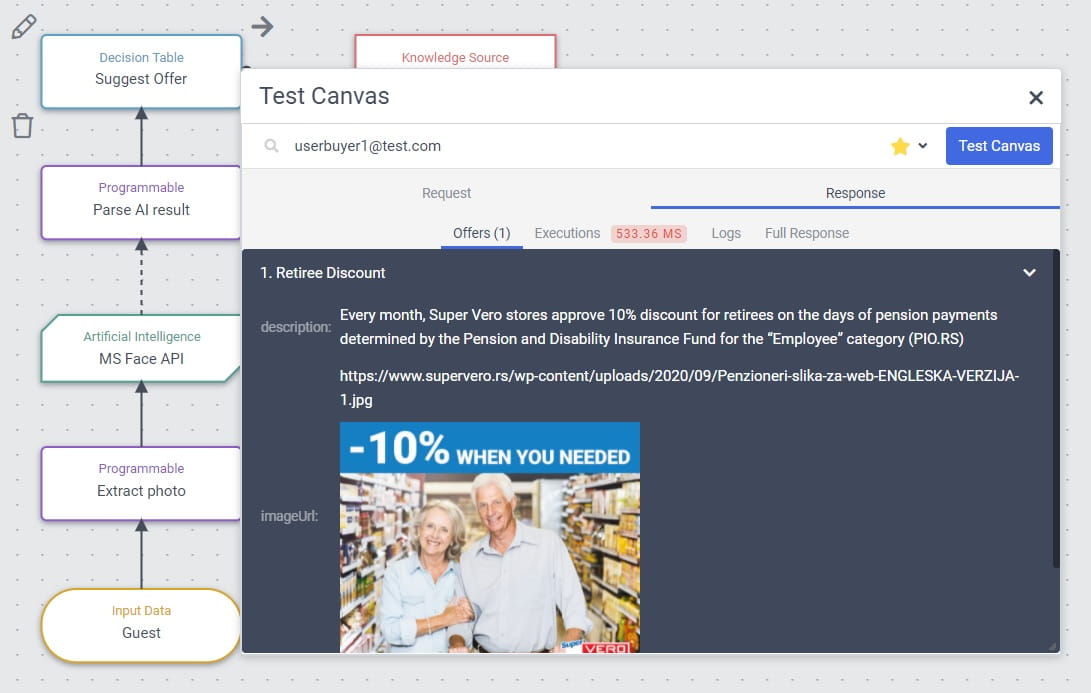
Decision model is ready and you can test it with Test Canvas tool:
The last thing to do is create Web experience. Navigate to Experiences -> Web and create new one. In Decisioning section link to created decision model and setup other sections how you need. In Content section choose predefined template "Corner Popup" and replace Image URL, Title, Description, CTA destination URL parameters with offer template variables:
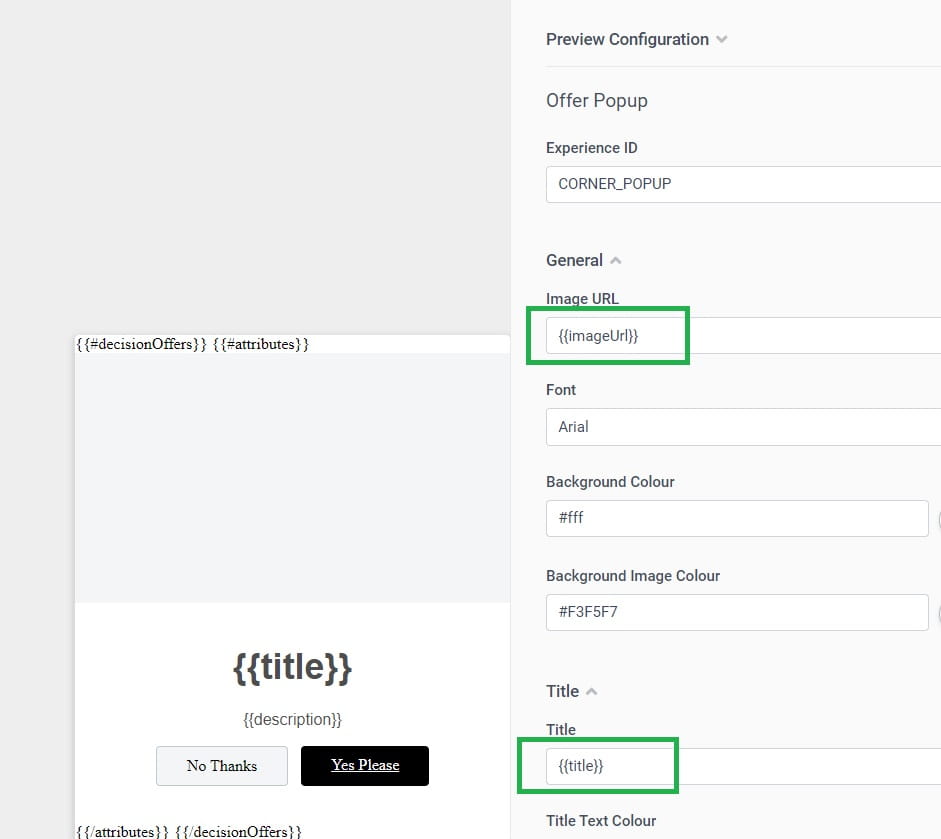
Go to "Advanced Edit" and configure variables:
API tab (Freemarker):
{
<#if (offers)??>
  "decisionOffers": ${toJSON(offers)},
</#if>
}
HTML tab:
{{#decisionOffers}}
  {{#attributes}}
    <div class="img-container">
        <div class="img-container__image" style='background-image: url("{{imageUrl}}");'></div>
    </div>
    <div class="bx-transition-card__body">

        <h3>[[Title | string | {{title}} | {required:true, group: Title, order: 1}]]</h3>
        <p>[[Description | text | {{description}} | {required:true, group: Description, order: 1}]]</p>
        <div class="options-container">
            <a id="bx-transition-card--secondary" class="options-container__secondary">[[Dismiss Text | string | No Thanks | {required:true, group: Secondary Button, order: 1}]]</a>
            <a id="bx-transition-card--primary" class="options-container__primary" href="{{linkUrl}}">[[CTA Text | string | Yes Please | {required:true, group: CTA Button, order: 1}]]</a>
        </div>
    </div>
    {{/attributes}}
{{/decisionOffers}}
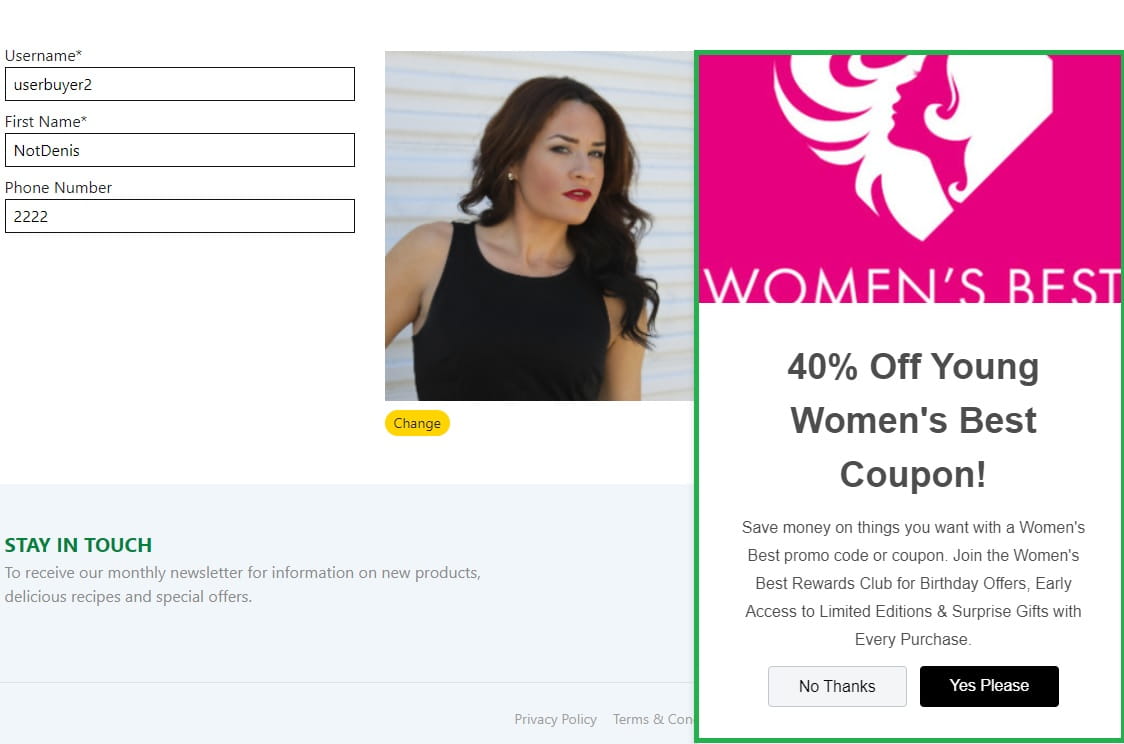
Demo is ready! Start Web experience, login to website and populate guest photo - you will see personalized offer if user matched decision criteria:
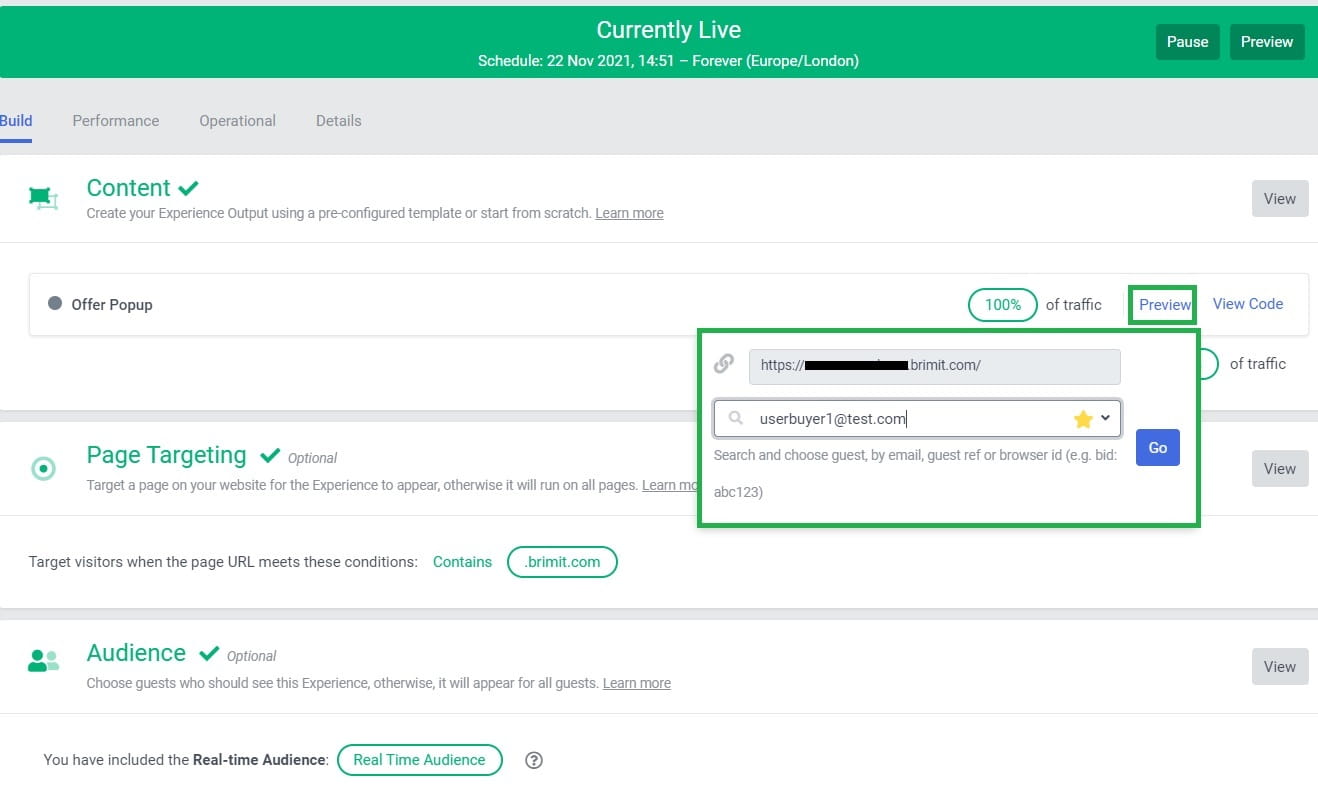
If you don`t see popup-offer you can debug your experience. Click on Preview button and populate inputs with your demo page and context user:
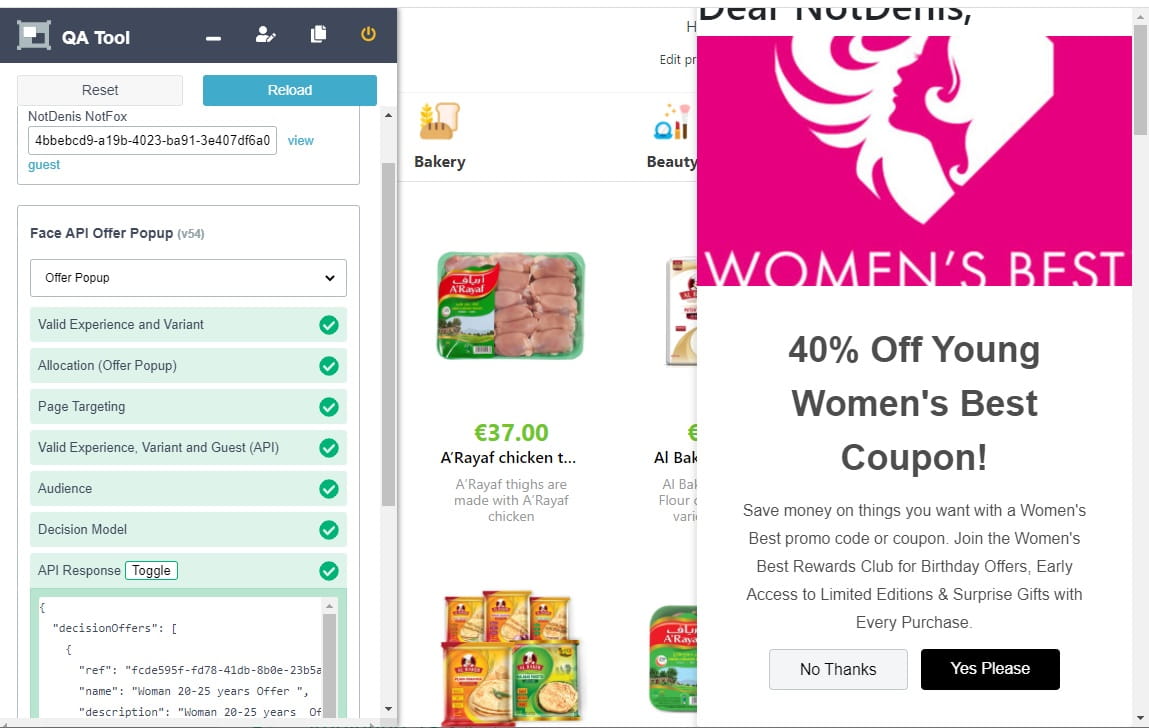
In QA Tool you will see detailed response with validators and it can be useful for troubleshooting:
See also:
My meetup demo about Sitecore CDP and custom AI service:
Source code of custom Age/Gender ML service is available on my Github.
Here goes the table of contents for my Sitecore CDP blog series:
- Introduction
- How to connect Sitecore CDP to website
- Debugging tools
- How to pass extended data to Sitecore CDP
- How to use Data System connections (Decision model with Content Hub products)
- How to use AI connections (Web experience with Azure Cognitive Services)
- How to use Destination connections (Triggered experience webhook)
- How to use External service connections (Flows with External Service)
- Remarketing with Sitecore CDP and Facebook Ads