Sitecore 9: Deploying Activity Type to Sitecore UI and Marketing Automation engine
As a result of previous efforts we have the following assets ready for deployment:
- Demo9.Features.dll - assembly that has activity type backend implementation
- Sendpromoemail.plugin.js - bundled UI components
- Activity definition item in Sitecore.
First we need to deploy assembly to Marketing Automation engine by uploading it to
<XConnectRootFolder>\App_data\jobs\continuous\AutomationEngine
Next we need to register our newly created activity type in configuration. We can create an xml patch file.
<XConnectRootFolder>\App_data\jobs\continuous\AutomationEngine\App_Data\Config\sitecore\ MarketingAutomation_patch\sc.MarketingAutomation.ActivityTypes.xml
<Settings>
    <!--
    Marketing Automation activity type registrations.
  -->
    <Sitecore>
        <XConnect>
            <Services>
                <MarketingAutomationDemo.Activity.SendPromoEmailActivity>
                    <Type>Sitecore.Xdb.MarketingAutomation.Locator.ActivityTypeRegistration, Sitecore.Xdb.MarketingAutomation</Type>
                    <LifeTime>Singleton</LifeTime>
                    <Options>
                        <Id>{F8B0DFFD-E3D3-4EA2-B3FA-8BFCAA4E41DA}</Id>
                        <ImplementationType>Demo9.Features.MarketingAutomation.Activities.SendPromoEmailActivity, Demo9.Features</ImplementationType>
                    </Options>
                </MarketingAutomationDemo.Activity.SendPromoEmailActivity>
            </Services>
        </XConnect>
    </Sitecore>
</Settings>
Make sure you set ID to the item ID of the action type definition. Note that node name like
MarketingAutomationDemo.Activity.SendPromoEmailActivity is up to you but make sure it is unique across all activity definitions.
Next, we need to deploy and register our UI bundle with Marketing Automation UI.
First upload Sendpromoemail.plugin.js to the following folder:
<sitecoreroot>\sitecore\shell\client\Applications\MarketingAutomation\plugins
As suggested by documentation we need to create the following patch file to register plugin within Sitecore.
<sitecoreroot>\App_Config\Include\MarketingAutomation\Demo9.Plugin.config
<?xml version="1.0"?>
<configuration xmlns:patch="http://www.sitecore.net/xmlconfig/" xmlns:set="http://www.sitecore.net/xmlconfig/set/" xmlns:role="http://www.sitecore.net/xmlconfig/role/">
    <sitecore role:require="Standalone or ContentManagement">
        <marketingAutomation>
            <pluginDescriptorsRepository>
                <plugins>
        <demo9 path="./plugins/sendpromoemail.plugin.js"/>
                </plugins>
            </pluginDescriptorsRepository>
        </marketingAutomation>
    </sitecore>
</configuration>
All good, now it's time to test.
Navigate to Marketing Automation Editor. Sitecore will try to load custom plugin with SystemJS and will most likely fail in the default setup with the following error:
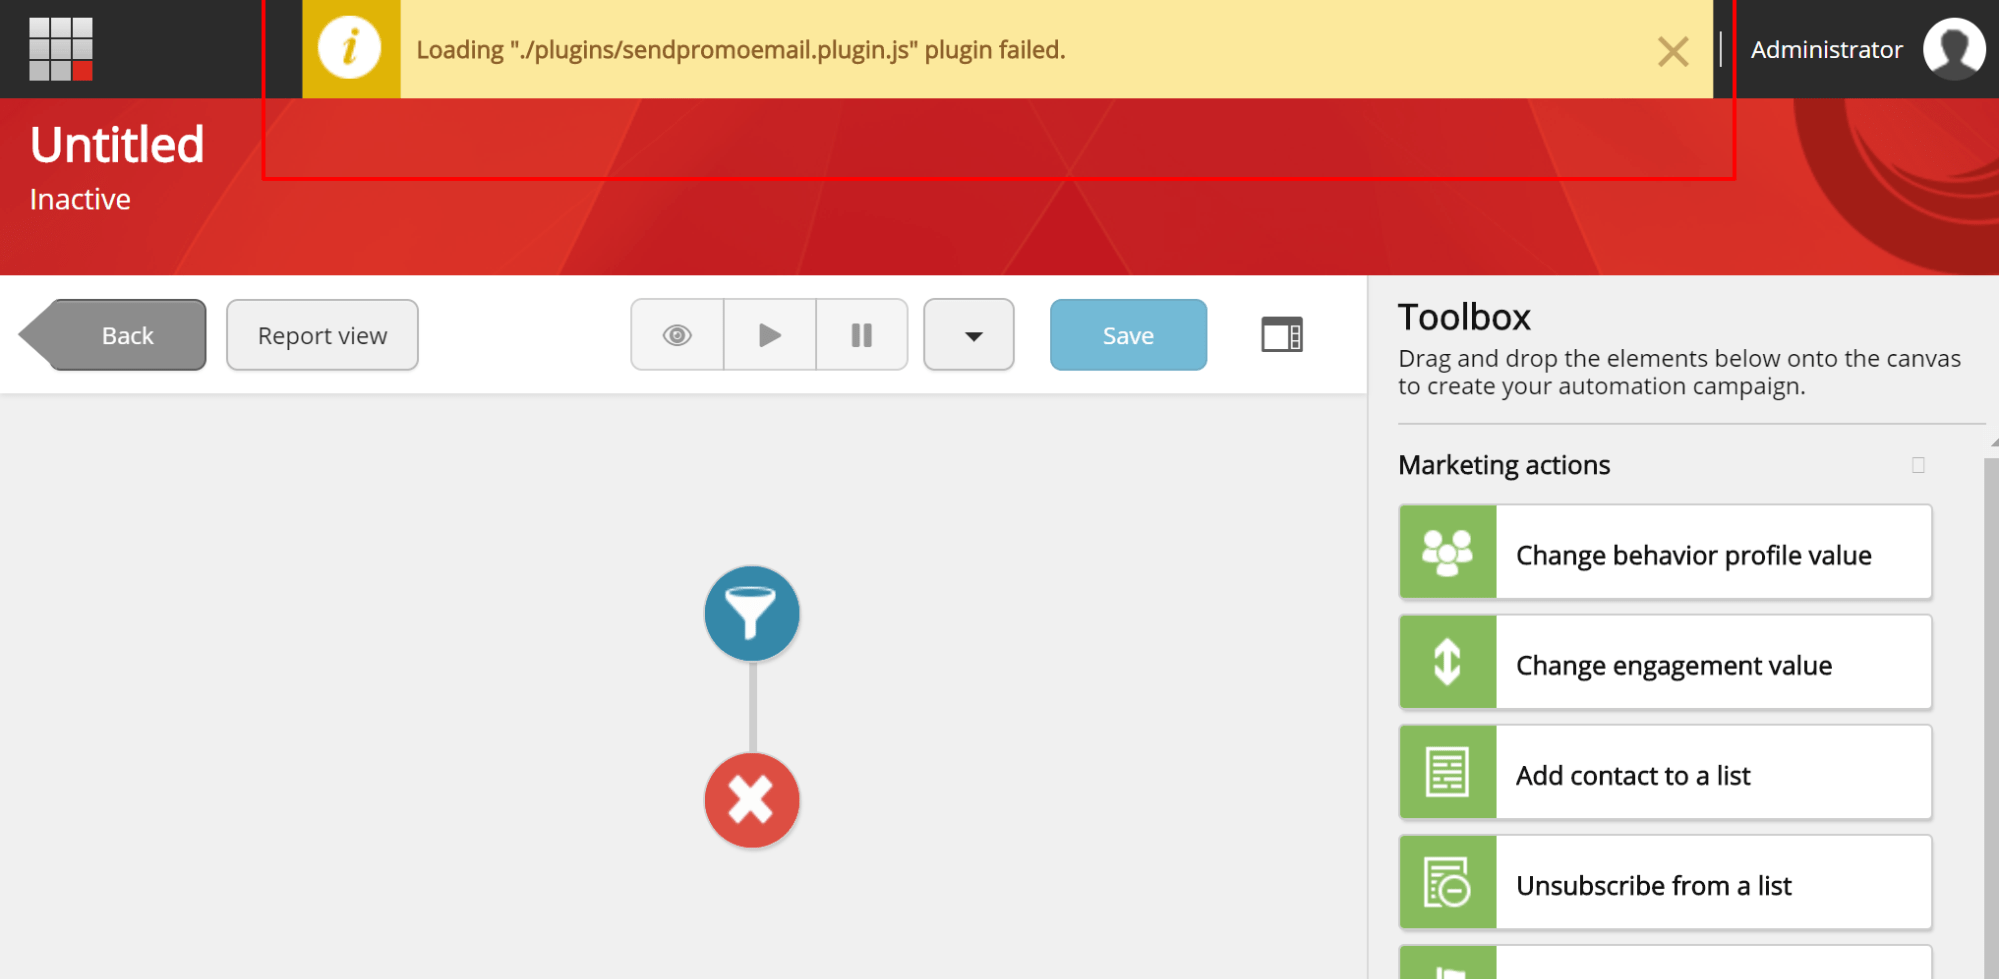
In the console you can find the following error:
main.26a730503150bac385ab.bundle.js:1 Error: Unexpected token <
  Evaluating http://demo9.brimit.com/sitecore/shell/client/Applications/MarketingAutomation/plugins/sendpromoemail.plugin.js
  Loading ./plugins/sendpromoemail.plugin.js
    at eval (<anonymous>)
You can quickly figure out that SystemJS tried to load script and was redirected to Sitecore login page. There are no cookies supplied by SystemJS, and so request to load plugin does not pass forms authentication enabled for Sitecore folders. As a workaround, we can grant access to /plugins folder by adding the following configuration to web.config
   <location path="sitecore/shell/client/Applications/MarketingAutomation/plugins">
    <system.web>
      <authorization>
        <allow users="*"/> <!--this will allow access to everyone-->
      </authorization>
    </system.web>
  </location>
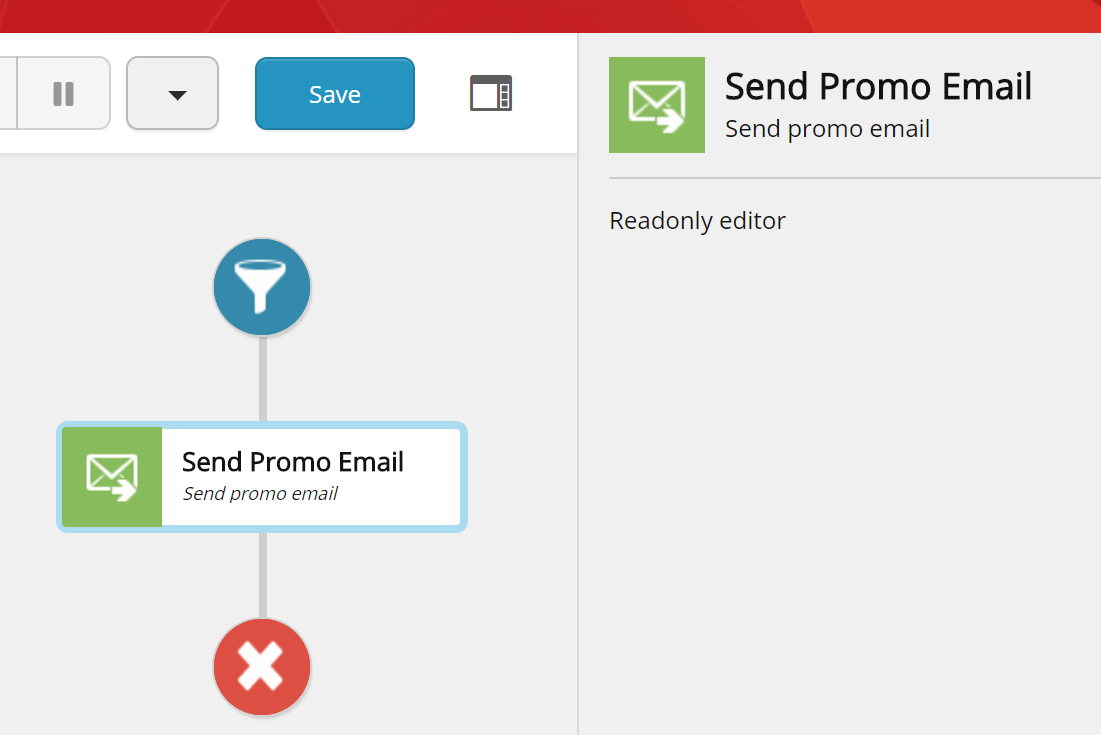
If everything was done correct, you will find your custom action in Plan Editor Toolbox under Marketing actions.

You can drag and drop it to the plan editor and click on the action to make sure editor loads fine. Remember we created very basic read only editor that only shows a label.
In the next post, I will create a more advanced activity type with parameters and multiple paths. I will also make use of activity services and Interaction data in the backend implementation.
You can find full source code on GitHub
Fly high with Sitecore 9.
Let’s assume we need to send an email or push notification as part of an engagement with contact. Once EXM for Sitecore 9 is released, i expect there will be an option to send triggered email. For now, we can create a custom action type “Send Promo Email”.
As mentioned before, Sitecore has great article that covers creating custom activity implementation. Documentation suggests we start by inheriting from IActivity interface that resides in Sitecore.Xdb.MarketingAutomation.Core.dll. Next, we need to implement Invoke() method that has IContactProcessingContext object as a parameter.
public override ActivityResult Invoke(IContactProcessingContext context)
IContactProcessingContext is very helpful to get contact and interaction data from activity context, i.e. the contact being evaluated by activity and interaction that resulted to activity or plan enrollment.
We will need contact’s preferred email address in order to send email and so we can make use of context.Contact facets in the following way.
EmailAddressList facet = context.Contact.GetFacet<EmailAddressList>();

if (facet == null || facet.PreferredEmail == null)
                return (ActivityResult)new Failure(Resources.TheEmailAddressListFacetHasNotBeenSetSuccessfully);
Failure activity result will cause the engine to retry our custom activity on the next “event/trigger”, hence the enrollment for the context contact will get stuck on current activity. Such activity result should only be used for catastrophic situations, and if you still want contact to move down the path, you can create additional activity path and move contact there by returning SuccessMove(“no-email”) activity result where “no-email” is alternative activity path.
Let’s leave the logic of SendEmail service out of scope and focus on Activity results where we use default path by returning SuccessMove() action result.
string email = facet.PreferredEmail.SmtpAddress;

//instantiating email service without DI for simplicity
var emailService = new EmailService();

if (!emailService.SendPromoEmail(email))
    return (ActivityResult)new Failure("Failed to send promo email");
 return (ActivityResult)new SuccessMove();
Note: You can make perfect use of Dependency Injection for your services as suggested by this article.
Note: Your contact may have custom facets associated. Be aware that only a certain list of facets is loaded by Sitecore automation engine to the context contact. Following the link, you can find additional information on loading contact facets. And you can always load additional data on demand.
Now we can create activity definition item. We create a new item from Activity Type template under /sitecore/system/Settings/Analytics/Marketing Automation/Activity Types
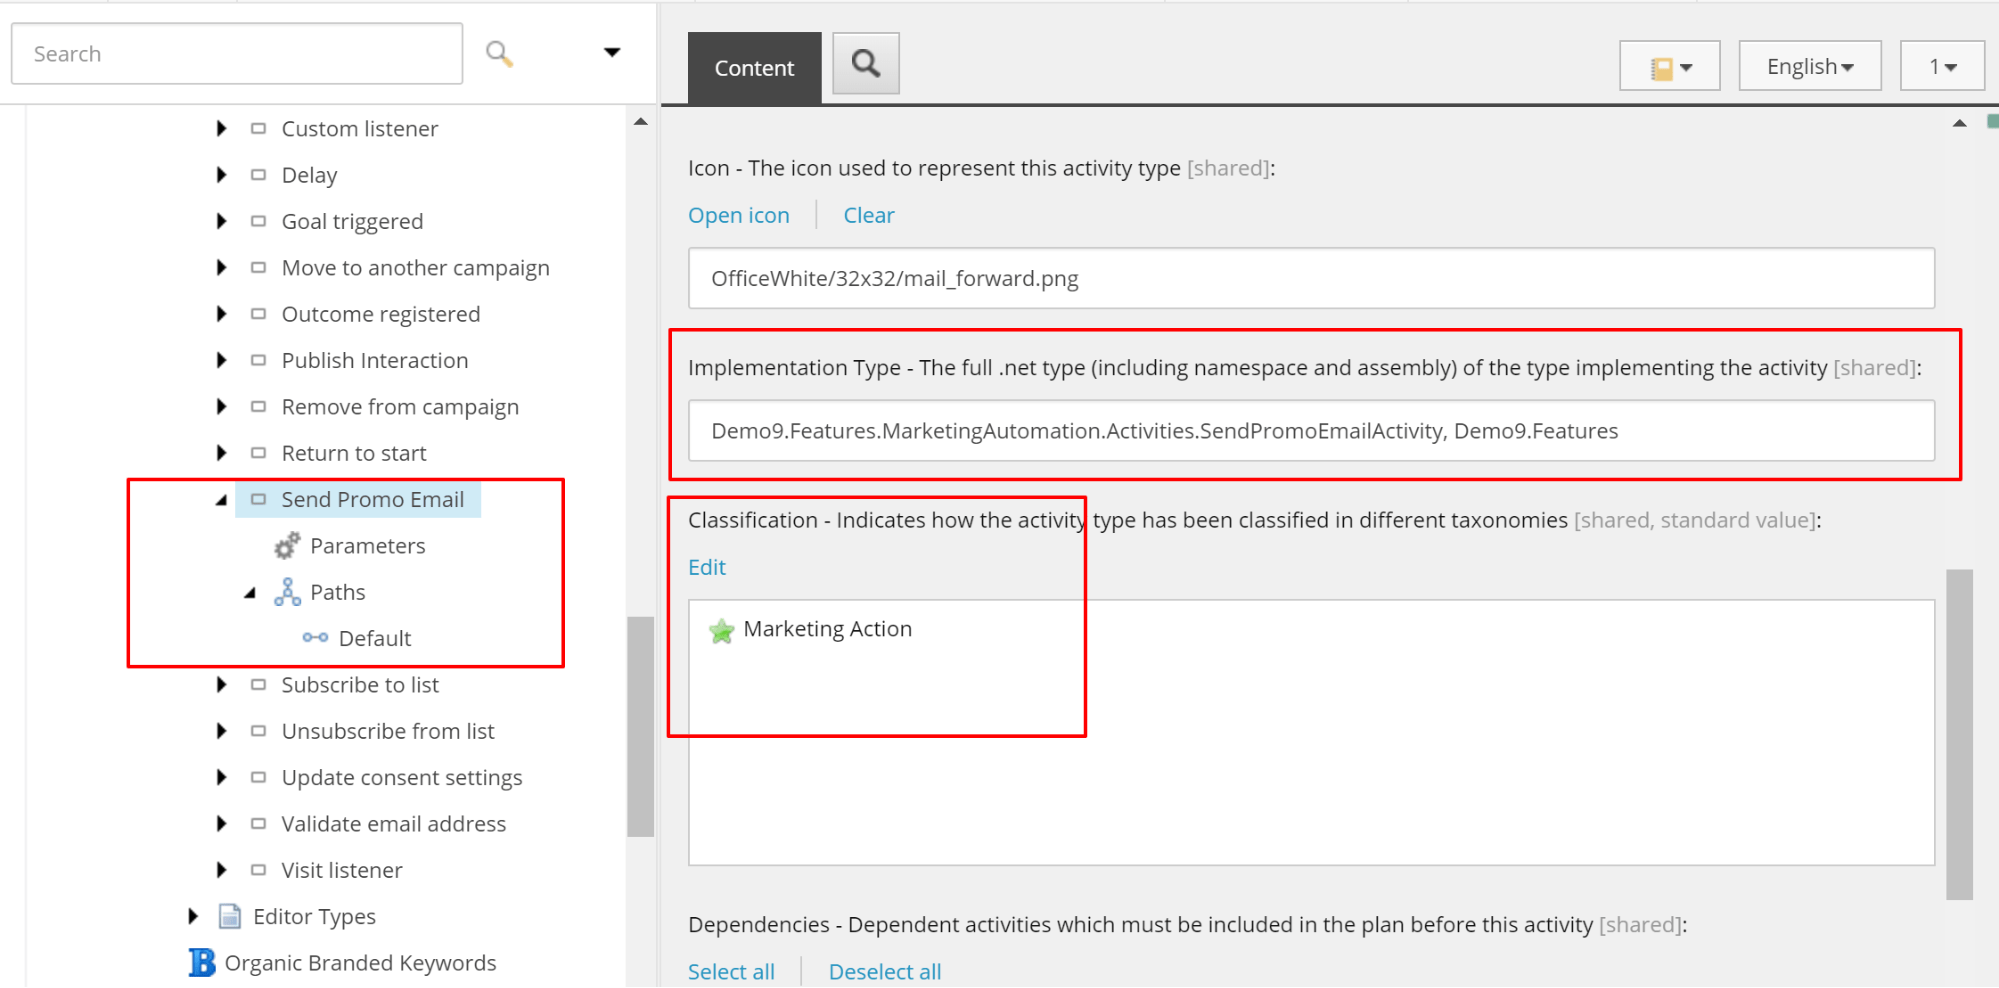
In the activity definition item we can set Implementation Type field to refer to our c# class. We will also need to classify our activity as Marketing Action so that it appears in the corresponding category of Marketing Automation Plan Editor Toolbox. Note that we have 0 parameters created and only one Default path. Basically, it means we don't have any parameters to be managed in the Action Type editor UI and there is only one exit possible from activity.
You can find full source code on GitHub
Browse to part 3 to learn how to create Activity Type UI and Editor.
Read more on marketing automation and Sitecore 9:
- Creating Activity Type backend logic and definition item
- Creating Activity Type UI and Editor
- Custom Marketing Automation Action - Introduction
- Marketing Automation API - enrolling contacts
- Marketing Automation - Repeated and concurrent contact enrollments
Do you need help with your Sitecore project?