Audience Sync vs Audience Export
In the previous article, we learned how to segment users in Sitecore CDP by CLV and predict churn customers. In this article, we will look at what we can do once we have that churn segment.
This will be a good example to compare Audience Sync and Audience Export (although Audience Export is presented as a replacement for Audience Sync, there are actually significant differences in both at the moment). Let's start with Audience export as a new feature that was released 2 weeks ago.
Audience Export
Sitecore CDP lets you export audiences built from a segment. The exported data can help you activate audiences outside Sitecore CDP. In fact Audience export can do almost everything that Audience Sync can do, I will highlight only the essential advantages:
- - export delta dataset
- - test the export before running it
- - friendly UI
- - fast speed
And the main advantage here is of course the export delta dataset. How useful this is, for example, for our task with Churn customers: we can track users who are just now getting into churn segment, and we don't need those who have been there for a long time.
When creating an audience export, we can add a connection to it. When the export finishes running, Sitecore CDP will send a webhook notification to the connected external API. We will create a connection to Sitecore Connect and configure it to extract the output of the audience export and then forward requests to Sitecore Send (to add user to the churn automation campaign). Let`s start implementation.
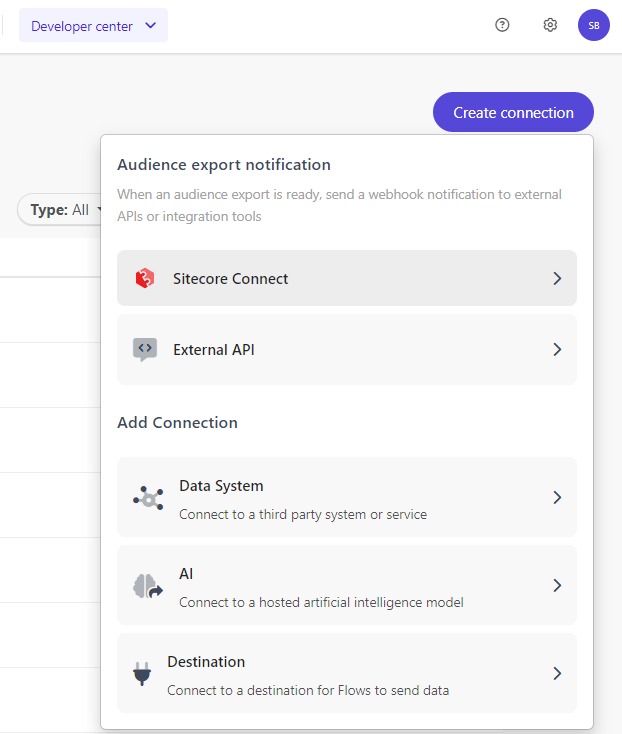
First, we will create connection to Sitecore Send. To do this, navigate to Developers center - Connections and click Create connection button and select Sitecore Connect option:
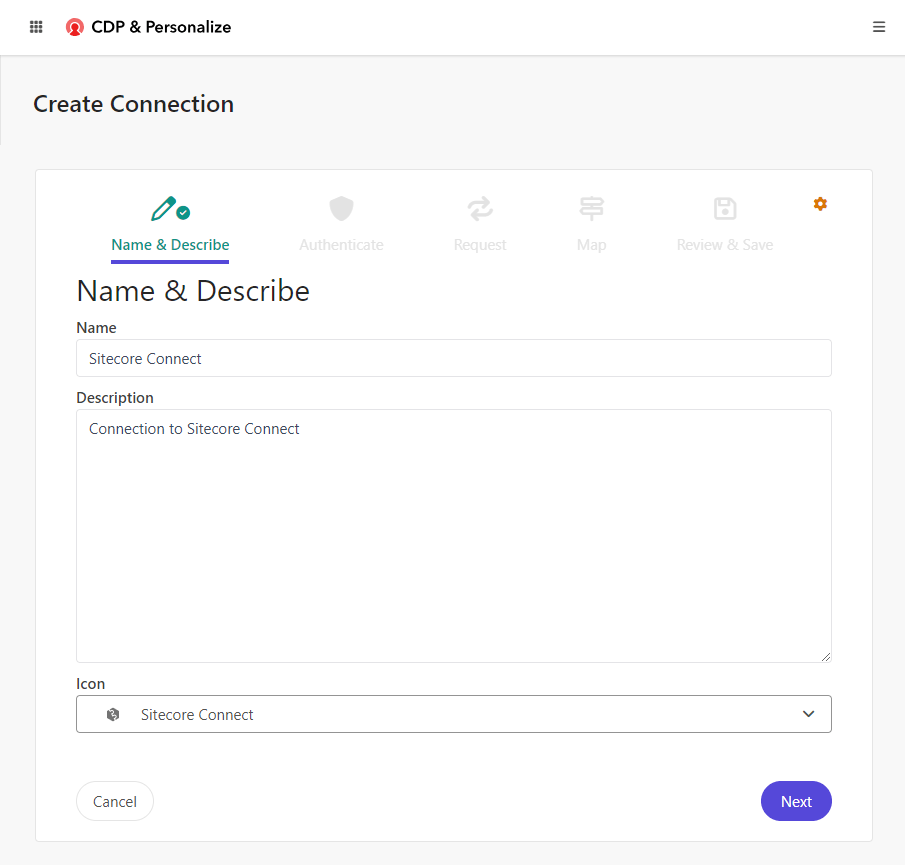
Next, configure connection the same way as any other connection in Sitecore CDP (authentification, request, and input/output fields):
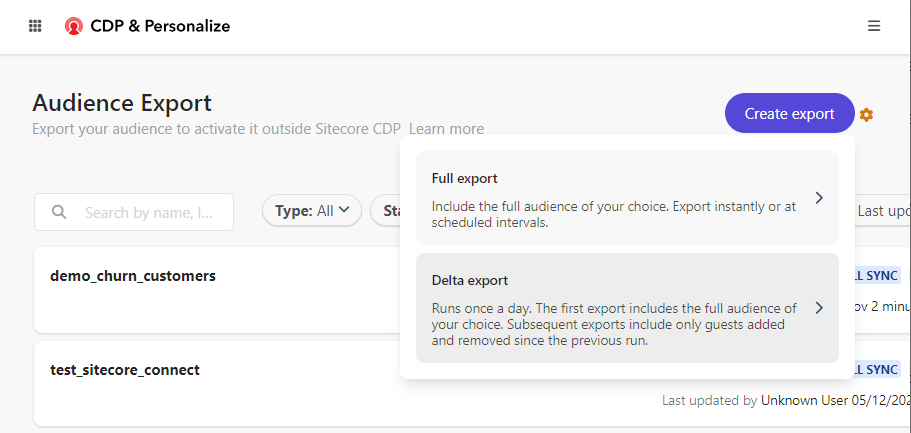
Once connection is ready, lets create new Audience Export. navigate to Audience sync - Audience Export, click Create export botton and select Delta option (we will track only users who are just now getting into churn segment, and we don't need those who have been there for a long time):
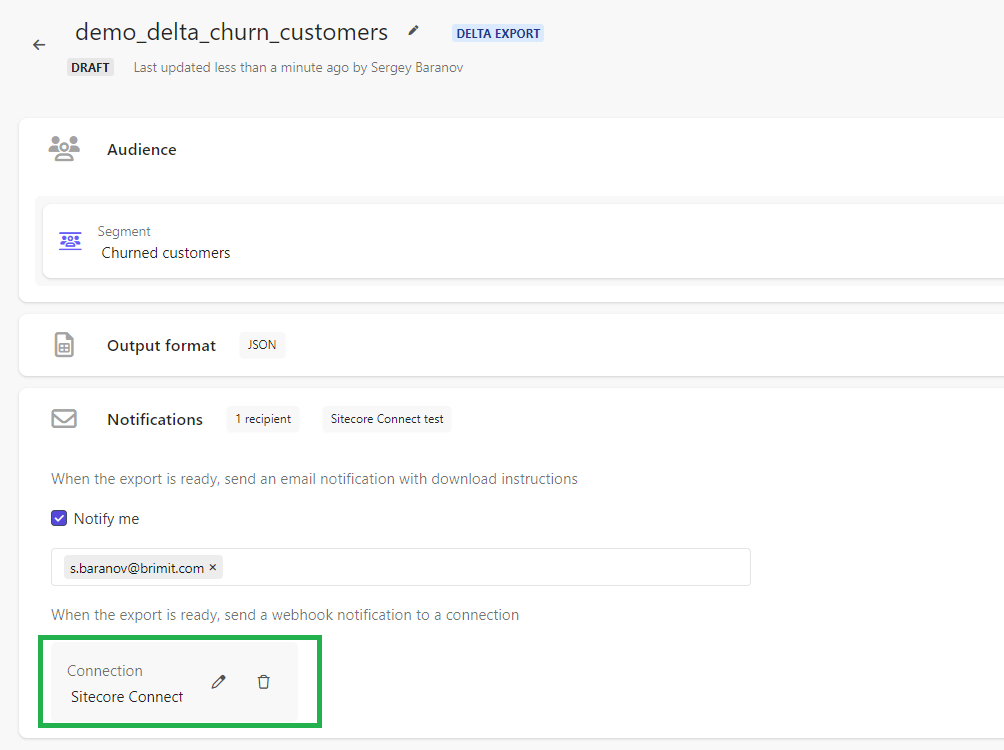
Type name of your connection (demo_delta_churn_customers), select segment (Churm customers), scroll down to Notifications section and configure webhook notification (select previoulsy created Sitecore Connect connection and tick Notify me checkbox to receive notification email or type any other email address/addresses):
Next, lets configure Output format of our export.
Navigate to the Javascript tab and paste the code below for receiving full name of our customers:
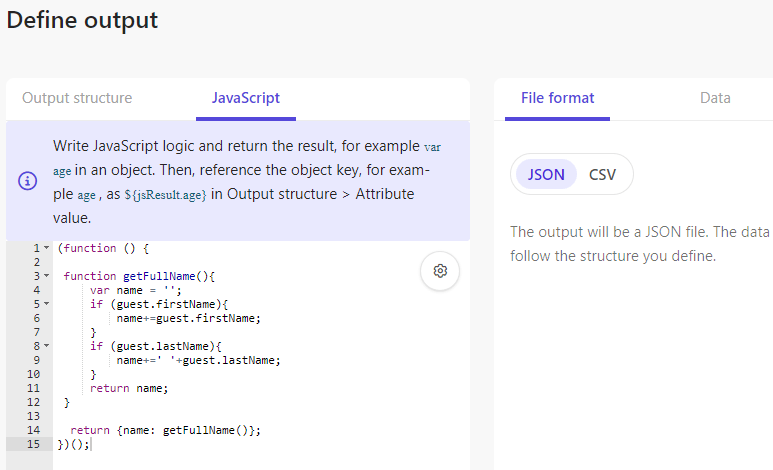
(function () {

 function getFullName(){
     var name = '';
     if (guest.firstName){
         name+=guest.firstName;
     }
     if (guest.lastName){
         name+=' '+guest.lastName;
     }
     return name;
 }

  return { name: getFullName()};
})();
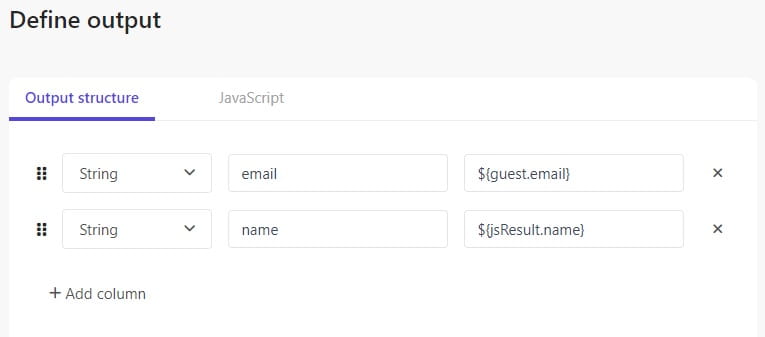
That`s all. Audience export is ready and we can start tesing.
To start testing, we need to click Schedule button and wait for when exporting will be executed. There is no way to run export immediately for Delta export, if you want to debug your export you should create Full export instead of Delta export and use 'Run now' button in your Full export.
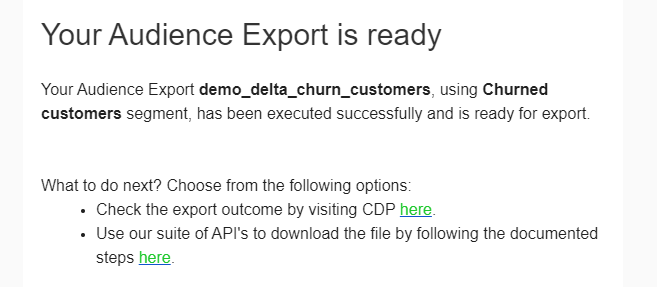
Once exporting is finished, you will receive email and webhook notification request to your endpoint (Sitecore Connect in our case):
Format of webhook request that you will receive in your endpoint is following:
Request Timestamp:        11/18/2023 1:36:48 PM
Request Method:           POST
Request Headers:
	Accept=application/json
	Accept-Encoding=gzip
	Connection=Keep-Alive
	Content-Type=application/json
	Max-Forwards=10
	Transfer-Encoding=chunked
	User-Agent=Jersey/2.35 (Apache HttpClient 4.5.13)
	X-Correlation-Id=f85a9e76-703a-4cbf-ae4e-c40ff0cefd4b
	X-Forwarded-For=52.19.243.67:52035
	X-ARR-LOG-ID=0ceb428e-c4b5-4682-a755-e02cc1e5950f
Request ContentType:      application/json
Request ContentBody:      {
  "apiUrl": "https://api-eu-west-1-production.boxever.com",
  "audienceExportName": "demo_delta_churn_customers",
  "clientKey": "xxxxxxxxxxxxxxxxxxxxxxxxxx",
  "definitionType": "FULL_SYNC",
  "executionRef": "c944516d-1c4a-447e-9de8-fcaee95ed960",
  "executionType": "INSTANT_RUN",
  "friendlyId": "demo_delta_churn_customers",
  "segmentName": "Churned customers",
  "status": "SUCCESS"
}
In Sitecore Connect we will send request to Sitecore CDP to get export download links, then request to Amazon to download gzip files, then uncompress files, split by JSON lines and send requests to Sitecore Send 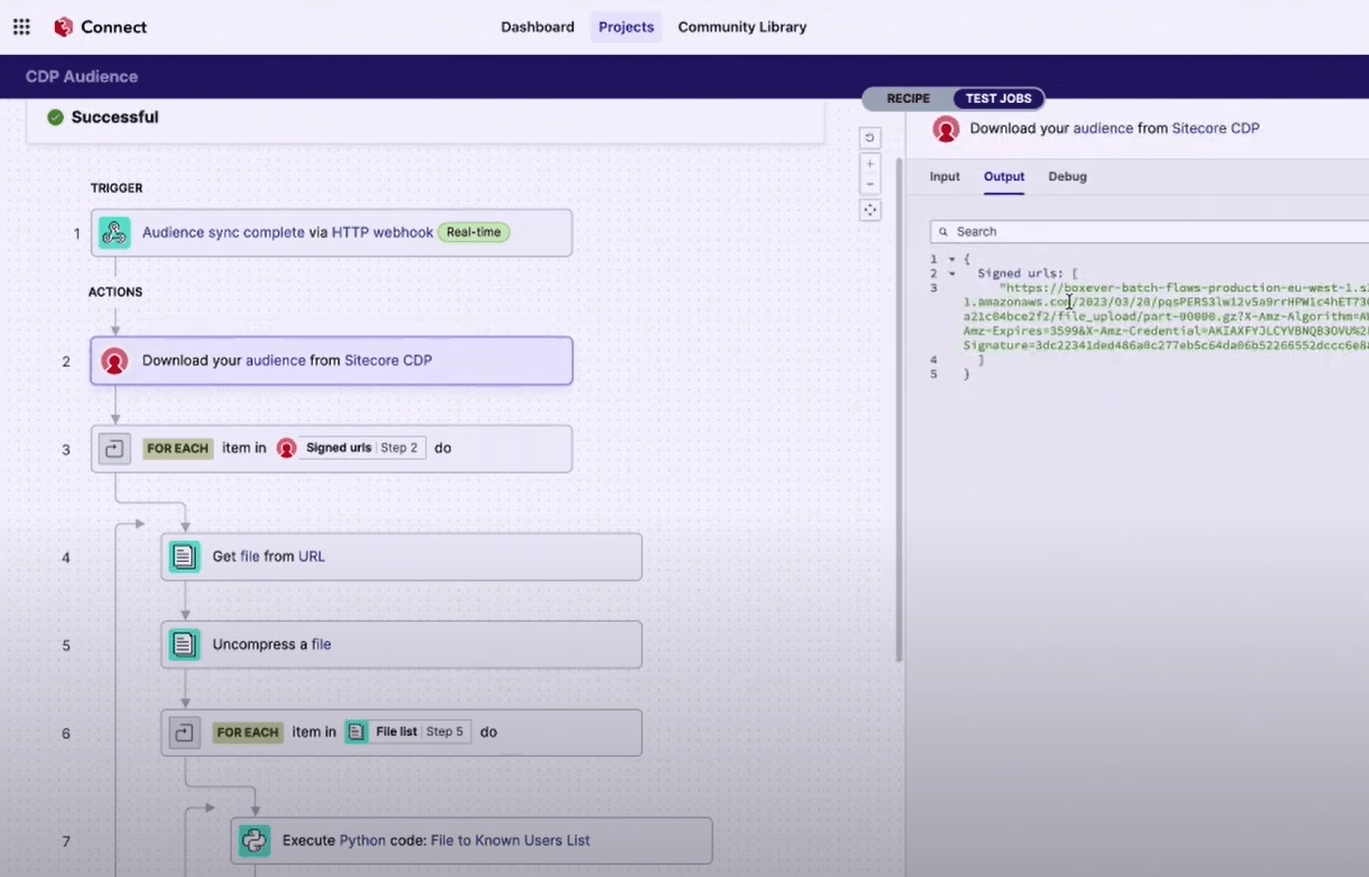
Audience Sync
An audience sync is an export of segment data to an external destination such as a remote server. For example, you can create an audience sync to power an ad campaign on a social media platform. But Audience Sync has one big advantage: it can send a webhook for each record from your segment in the format you want.
Example: you want to automatically add a user to a campaign in Sitecore Send when he/she enters a churn segment. To do this, you need to send a request from Sitecore CDP to Sitecore Send and pass user information (email, username) as parameters. Audience Export can not do it, but Audience Sync can.
Before we start implementing Audience sync, let`s first create Batch Web Hook.
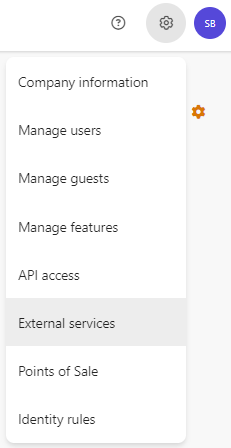
Navigate to Settings - External Services and click Create button:
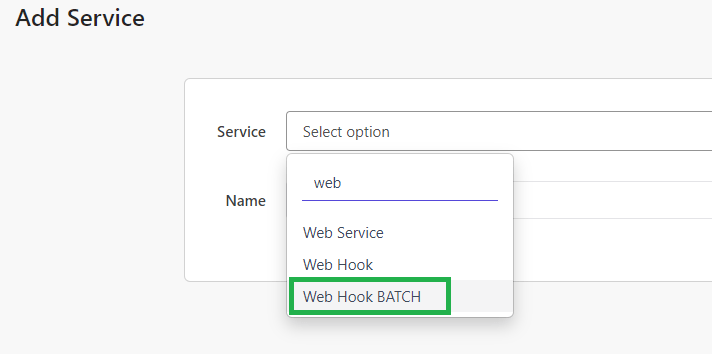
Select Batch Web Hook in Service dropdown and type a name of your service (Batch Web Hook 1):
You can additionally configure Authorisation to your webhook service, but we do not need it for Sitecore Send (it uses apiKey).
Next, we need to create Audience sync template. Navigate to Developer center - Audience sync template and click Create template button.
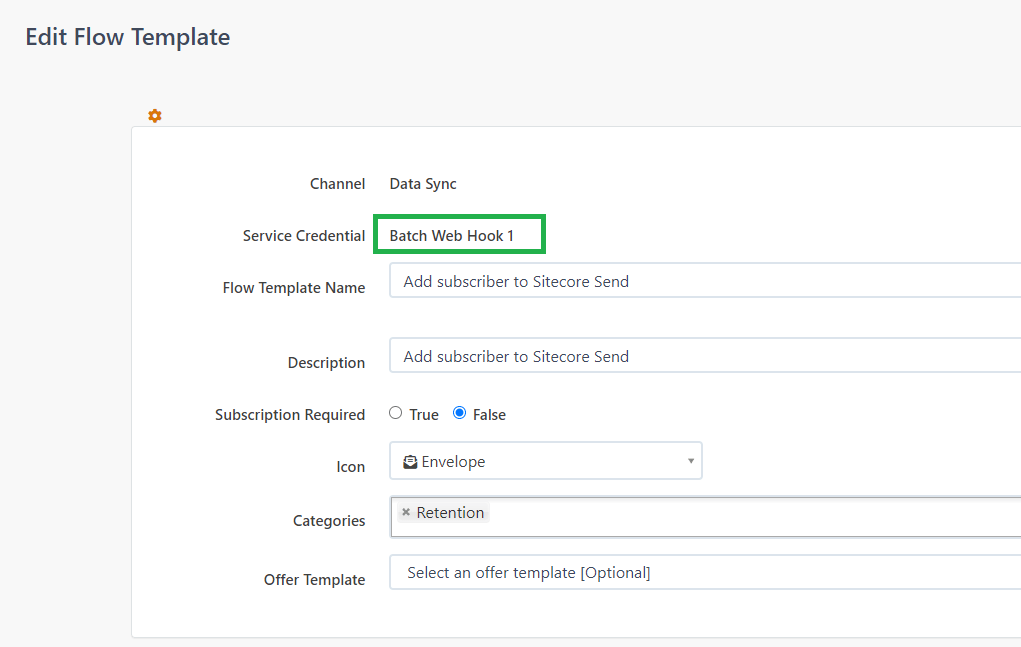
Select previously created Batch Web Hook 1 service in Select service credentials dropdown:

Configure Audience Sync template as following:
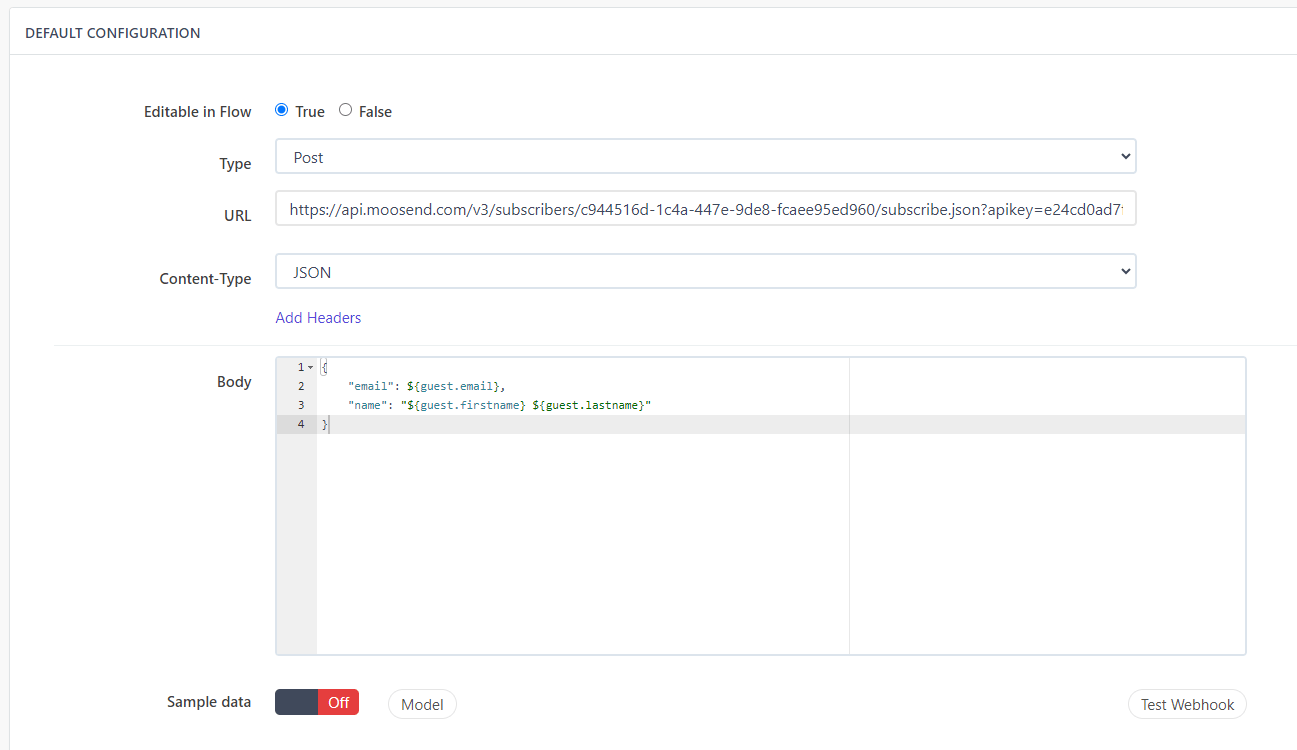
Request format to Sitecore Send is following:
POST https://api.moosend.com/v3/subscribers/{{MailingListID}}/subscribe.{{Format}}?apikey={{apiKey}}

{
    "Email": "email@example.com",
    "Name": "User Name",
    "CustomFields": [
        "Some Custom Field=123"
    ]
}
And the last thing we need to do is to create new Audience Sync. Navigate to Audience sync - Audience sync and click Create Sync button. Select previously created template, select Churn customers segment and fill other required fields (name, description, etc.). Thats is all, now you can run audience sync by clicking Test Webhook button or by clicking Save - Run now.
Format of webhook request that you will receive in your endpoint is following:
Request Timestamp:        11/18/2023 3:31:25 PM
Request Method:           POST
RequestHeaders:           Accept-Encoding=gzip,deflate
Connection=Keep-Alive
Content-Length=69
Content-Type=application/json
Max-Forwards=10
User-Agent=Apache-HttpClient/4.5.1 (Java/1.8.0_282)
X-Forwarded-For=63.34.205.183:28423
X-ARR-LOG-ID=9bc66fa5-0c4a-4299-aa7d-fd841524aa0a

Request ContentType:      application/json
Request ContentBody:      {
    "email": "email@example.com",
    "name": "User Name",
}
