There are a couple of products which enable VR experience for Sitecore. They claim that once the product set up is complete, there will be no need to engage software engineers for adding and tuning 3D content. We believe that this is true for some of the cases, however not for all. A Sitecore website still might need some coding in order to make a rich 3D scene truly interactive.
Luckily, a Sitecore expert can do that and my guide will be of help.
Where Sitecore VR experience can come in useful?
- On a retail website for a 3D view of a product (a product can be viewed in 3D both with or without VR gear)
- For a 360º view of a property for rent or a tourist attraction
- For a three-dimensional view of a restaurant, lodge, cafe interior
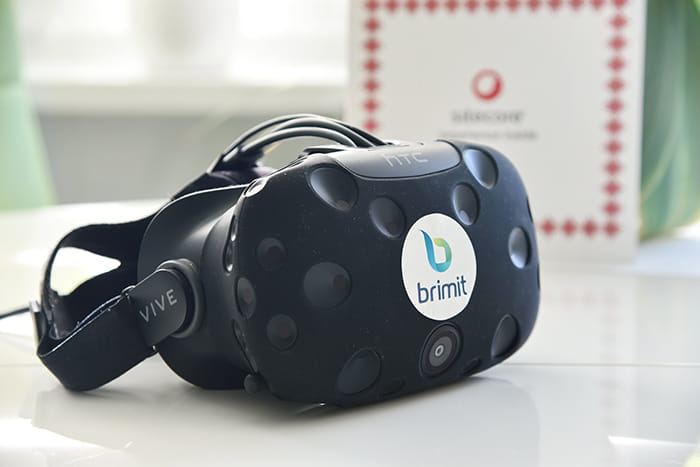
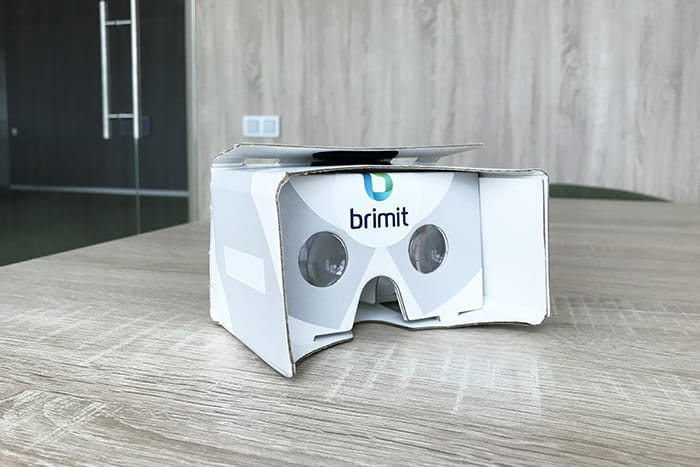
Do users need expensive VR gear in order to use VR content?
They do if they need to immerse into virtual reality. Basic VR goggles start from US$200. Expensive VR goggles can be replaced with a VR cardboard, which costs several dollars or sometimes can be grabbed as a free give-away. However 3D objects can be displayed as 2D on a computer or a mobile device screen and users can interact with an object with their touchpad/mouse or fingers on a mobile device.
The Guide
How to make 3D out of 2D?
These are the most popular tools for creating 3D scenes: A-Frame.io, PlayCanvas, and Three.Js. These tools are suitable not only for 3D scenes but also for working with VR goggles. In this article, I will not describe in detail how to use these libraries as they are well documented. I can only say that all of them are based on the definition of JS script in an HTML document, loading a 3D object and creating special markup for the scene. 3D objects can be not only downloaded from third-party files but also described manually using special markup. Also for more colorful scenes, it's a good idea to use resource files that store textures or surface descriptions.
Creating a 3D scene
For my demo project, I will use the A-Frame.io library. You need to connect the script and describe the following attributes using the markup: assets of objects, the 3D object of the product that we will show, the floor, and the camera.
<!doctype html>
<html class="no-js" lang="">

<head>
 <meta charset="utf-8">
 <title></title>
 <meta name="description" content="">
 <meta name="viewport" content="width=device-width, initial-scale=1">

 <link rel="manifest" href="site.webmanifest">
 <link rel="apple-touch-icon" href="icon.png">
 <!-- Place favicon.ico in the root directory -->

 <link rel="stylesheet" href="css/normalize.css">
 <link rel="stylesheet" href="css/main.css">

 <meta name="theme-color" content="#fafafa">
 <script src="https://aframe.io/releases/0.9.2/aframe.min.js"></script>
 <script>
   AFRAME.registerComponent('sitecore-demo', {
     init:function(){
       console.log('Sitecore demo running');

   });
 </script>

</head>

<body>
 <!--[if IE]>
   <p class="browserupgrade">You are using an <strong>outdated</strong> browser. Please <a href="https://browsehappy.com/">upgrade your browser</a> to improve your experience and security.</p>
 <![endif]-->

 <!-- Add your site or application content here -->

 <!-- Scene -->
 <a-scene id="sitecore-demo" background="color: #AAB" fog="type: linear; color: #AAB; far: 30; near: 0">

   <!-- Demo assets -->
   <a-assets>
     <a-asset-item id="sitecore-gltf" src="models/product.glb"></a-asset-item>
   </a-assets>


   <!-- Product  -->
   <a-entity scale="0.5 0.5 0.5" rotation="0 0 0"
             geometry=""
             gltf-model="#sitecore-gltf"
             position="0 1.9 1"
             shadow="cast: true; receive: false"
             animation="property: rotation; to: 0 360 0; loop: true; dur: 30000">
   </a-entity>

   <!-- Creates the ground -->
   <a-plane rotation="-90 0 0" width="500" height="500" color="#eee" shadow="cast: true; receive: true"></a-plane>

   <!-- Camera -->
   <a-entity camera="userHeight:1.8;" wasd-controls look-controls position="0 1.8 3" ></a-entity>

 </a-scene>

 <script src="js/vendor/modernizr-3.7.1.min.js"></script>
 <script src="https://code.jquery.com/jquery-3.3.1.min.js" integrity="sha256-FgpCb/KJQlLNfOu91ta32o/NMZxltwRo8QtmkMRdAu8=" crossorigin="anonymous"></script>
 <script>window.jQuery || document.write('<script src="js/vendor/jquery-3.3.1.min.js"><\/script>')</script>
 <script src="js/plugins.js"></script>
 <script src="js/main.js"></script>


</body>

</html>
I downloaded a ready model in GLTF format from here https://sketchfab.com/3d-models/iphone-5s-2a8b3bd5333d4f1899a67d5dca6b24ab. You need to note that the GLTF format is an ordinary JSON file that contains links to model files and texture files. In order for us to work with only one file that contains all these data, it makes sense to convert the files into a package. This can be done through multiple software and online tools. I chose this tool https://glb-packer.glitch.me/. As an output, I got only one file in GLB format.
The resulting file is included in the A-Assets section.
Please note that you can control your movement with WASD keys on the computer keyboard. Also, this layout supports HTC Vive, Oculus Rift, Oculus Quest, Oculus Go, Google Daydream, Samsung GearVR, Vive Focus. You should also keep in mind that not all the devices support controllers, but it is possible to create your own version of the control and HUD for these devices.
Define the scenario
Our project will have one page, which displays the name, description, and price of the goods.
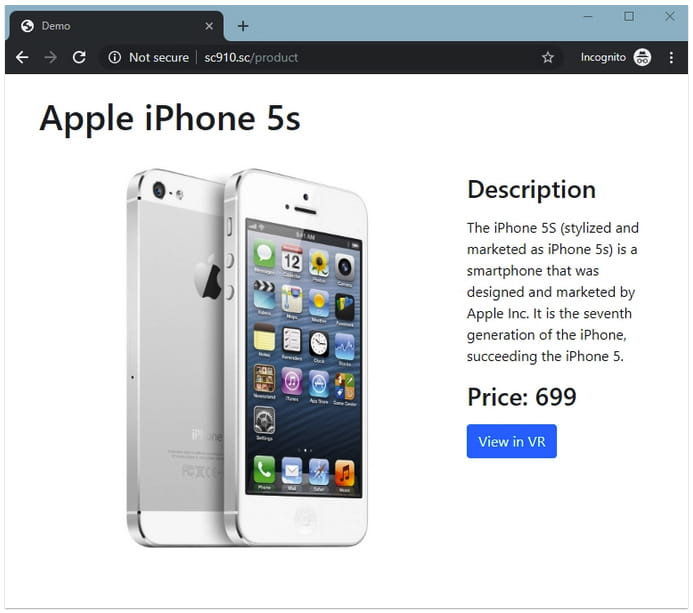
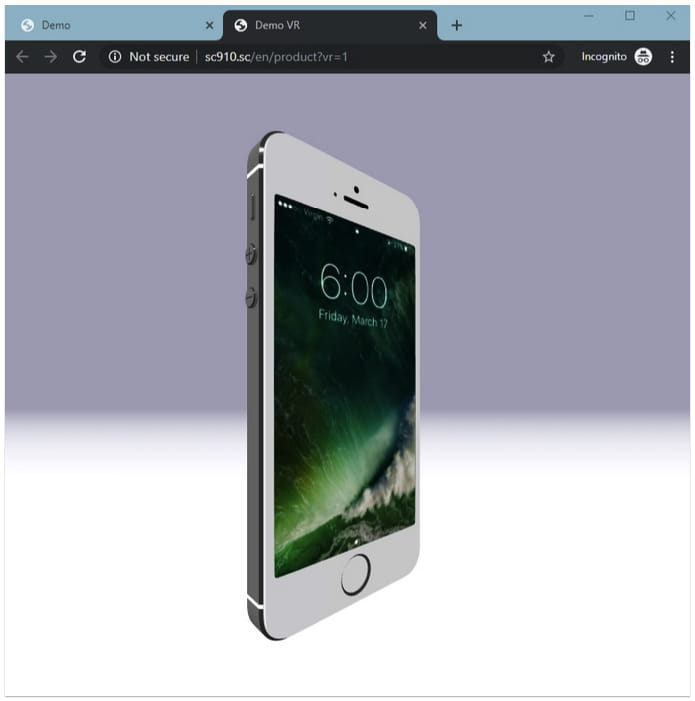
After pressing the "View in VR" button, a new tab with a 3D model will open. It is important to understand that the demo is very simple, but gives an idea of how far we can go by combining Sitecore and VR.
Adding custom layouts
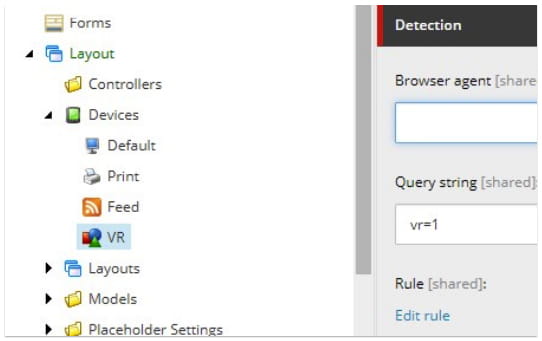
Add a new device in /sitecore/layout/Devices and set vr=1 in the query string field. After that, we can use our new device on the page for which we will display the virtual product.
The next step is to add a separate layout to the /sitecore/layout/Layouts for the virtual mode. This layout will contain lightweight markup and the A-Frame script

Specify the placeholder to insert the component
@using Sitecore.Mvc
@{
    Layout = null;
}

<!DOCTYPE html>

<html>
<head>
    <meta charset="utf-8">
    <meta http-equiv="X-UA-Compatible" content="IE=edge,chrome=1">
    <meta name="viewport" content="width=device-width, initial-scale=1.0, maximum-scale=1.0, user-scalable=no">

    <title>Demo VR</title>
    <script src="https://aframe.io/releases/0.9.1/aframe.min.js"></script>
</head>
<body>
    <div>
        @Html.Sitecore().Placeholder("main")
    </div>
</body>
</html>
Now it's time to apply the resulting layout on the demo page. Insert Controller rendering into the Main layout, which will display a 3D product. We have a default layout where there is also the main placeholder. We will insert a Product rendering in both the layouts, which will display a different HTML code depending on the device.

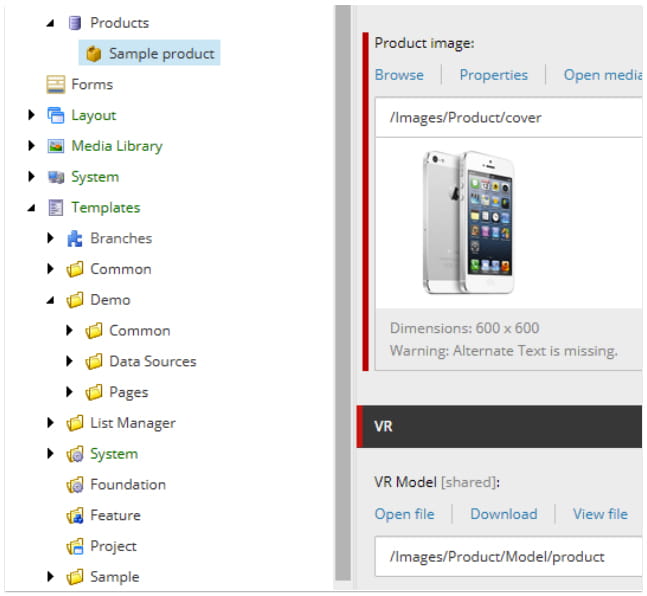
As a data source, we use a predefined element with fields to describe the product. In addition to the standard fields, I used two additional fields of the FILE type. I loaded GLB files into this field.
Adding a product component
The component for displaying product information with the help of a helper determines what type of device is used. Here is the controller code
using System;
using System.Linq;
using System.Web.Mvc;
using SC91.Feature.Product.Models;
using SC91.Foundation.Devices.Helpers;
using Sitecore;
using Sitecore.Data;
using Sitecore.Data.Fields;
using Sitecore.Data.Items;
using Sitecore.Layouts;
using Sitecore.Mvc.Presentation;

namespace SC91.Feature.Product.Controllers
{
    public class ProductController : Controller
    {
        public ActionResult Index()
        {
            var dataSourceId = RenderingContext.CurrentOrNull.Rendering.DataSource;
            var dataSource = Sitecore.Context.Database.GetItem(dataSourceId);

            if (dataSource == null)
                throw new NullReferenceException("Data source is empty");

            var viewModel = new ProductViewModel()
            {
                Product = new Entities.Product(dataSource)
            };

            if (DeviceHelper.IsVrDevice())
            {
                return this.View("IndexVR", viewModel);
            }
            else
            {
                return this.View("Index", viewModel);
            }
        }
    }
}
Here's how I detect the VR device type. GetVrLink method is used to generate vr=1 parameter in the link for the button "View in VR"
private const string VR_DEVICE = "{75DC9210-B082-4D73-928B-F6F7649E1BFD}";
public static bool IsVrDevice()
{
    var currentItem = Sitecore.Context.Item;
    var layoutField = new LayoutField(currentItem);

    LayoutDefinition layoutDef = LayoutDefinition.Parse(layoutField.Value);
    DeviceDefinition deviceDef = layoutDef.GetDevice(Sitecore.Context.Device.ID.ToString());

    return deviceDef.ID == VR_DEVICE;
}

 public static string GetVrLink(Item item)
 {
     if(item == null)
         throw new ArgumentNullException(nameof(item));

    DeviceItem deviceItem = Context.Database.Resources.Devices.GetAll()
    .First(d => d.ID == ID.Parse(VR_DEVICE));

    if (deviceItem != null)
        return Sitecore.Links.LinkManager.GetItemUrl(item) + "?" + deviceItem.QueryString;

    return null;
}
Normal browser view Index.cshtml
@using SC91.Feature.Product.Entities
@using SC91.Foundation.Devices.Helpers
@using Sitecore.Mvc
@model SC91.Feature.Product.Models.ProductViewModel
@{
    Layout = null;
}

<!-- Portfolio Item Heading -->
<h1 class="my-4">@Model.Product.Title</h1>

<!-- Item Row -->
<div class="row">

    <div class="col-md-8">
        <img class="img-fluid" src="@Model.Product.GetImageLink()" alt="">
    </div>

    <div class="col-md-4">
        <h3 class="my-3">Description</h3>
        <p>@Html.Raw(Model.Product.Description)</p>
        <h3 class="my-3">Price: @Model.Product.Price</h3>
        <p>
            <a href="@DeviceHelper.GetVrLink(Sitecore.Context.Item)" class="btn btn-primary" target="_blank" rel="noopener noreferrer">View in VR</a>
        </p>
    </div>

</div>
<!-- /.row -->
VR presentation IndexVR.cshtml
@using SC91.Feature.Product.Entities
@model SC91.Feature.Product.Models.ProductViewModel
@{
    Layout = null;
}

<script>
    AFRAME.registerComponent('sitecore-demo', {
        init:function(){
            console.log('Sitecore demo running');

    });
</script>

<!-- Scene -->
<a-scene id="sitecore-demo" background="color: #AAB" fog="type: linear; color: #AAB; far: 30; near: 0">

    <!-- Demo assets -->
    <a-assets>
        <a-asset-item id="sitecore-gltf" src="@Model.Product.GetVrModelLink()"></a-asset-item>
    </a-assets>


    <!-- Product -->
    <a-entity scale="0.5 0.5 0.5" rotation="0 0 0"
              geometry=""
              gltf-model="#sitecore-gltf"
              position="0 1.9 1"
              shadow="cast: true; receive: false"
              animation="property: rotation; to: 0 360 0; loop: true; dur: 30000">
    </a-entity>

    <!-- Creates the ground -->
    <a-plane rotation="-90 0 0" width="500" height="500" color="#eee" shadow="cast: true; receive: true"></a-plane>

    <!-- Camera -->
    <a-entity camera="userHeight:1.8;" wasd-controls look-controls position="0 1.8 3" ></a-entity>

</a-scene>
I would like to stress that when generating links to the GLB file with standard output using .ashx, I was unable to get the script to work. I had to remove the "ashx" value from the configuration.
<setting name="Media.RequestExtension" value="ashx" />
And, finally, the code of the product.
using System;
using SC91.Foundation.Devices.Helpers;
using Sitecore.Data.Fields;
using Sitecore.Data.Items;

namespace SC91.Feature.Product.Entities
{
    public class Product

        public Product(Item item)

            InnerItem = item ?? throw new ArgumentNullException(nameof(item));

            this.Title = InnerItem.Fields["Product title"]?.Value;
            this.Description = InnerItem.Fields["Product description"]?.Value;
            this.Price = Convert.ToDecimal(InnerItem.Fields["Product price"]?.Value);
            this.Image = ((ImageField)InnerItem.Fields["Product image"])?.MediaItem;
            this.VrModel = ((FileField)InnerItem.Fields["VR Model"])?.MediaItem;


        public Item InnerItem { get; }
        public string Title { get; set; }
        public string Description { get; set; }
        public decimal Price { get; set; }
        public Item Image { get; set; }
        public Item VrModel { get; set; }


    public static class ProductExt

        public static string GetImageLink(this Product product)

            return product?.Image != null
                ? Sitecore.Resources.Media.MediaManager.GetMediaUrl(product.Image)
                : null;


        public static string GetVrModelLink(this Product product)

            return product?.VrModel != null
                ? Sitecore.Resources.Media.MediaManager.GetMediaUrl(product.VrModel)
                : null;


}
As you may have understood, the solution is not complex. Seems that the most time-consuming part will be the generation of 3D models.
Source code
All source code excluding Sitecore items can be found here.
Do you need help with your Sitecore project?